


Two brew methods that are going to give us a very consistent cup if we keep our technique the same are the V60 and the Kalita.
When comparing the V60 to the Kalita, you will notice a big difference in the way they look. The V60 has a very large hole. The Kalita has three very small holes. This may help some people with getting a more even extraction than when using the V60. However, in the right hands, both can provide excellent extractions. In a previous post we went over using the V60 pour over. Here we will highlight the Kalita and how to use it to brew a great cup.
To begin, we will weigh out the beans for the Kalita using the standard ratio we use in our shops which is 22g of coffee to 350g of water. When we grind our beans, believe it or not, our settings will not be much different than if we were doing a V60. Although our grind settings may vary based on the model and calibration of our grinder, what we ultimately want is a grind that will allow for an extraction time of about 2 ½ minutes.
-

- A Kalita has three small holes whereas the V60 has one large hole.
-
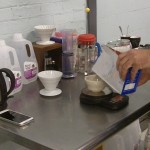
- To begin, weigh out 22g of coffee for 350g of water.
-
- When grinding your coffee, set your grind to achieve an extraction time of 2.5 minutes.
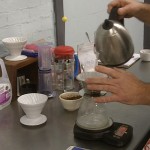
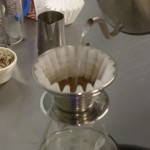
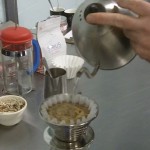
When we’re ready to brew our Kalita, the first thing we will want to do is rinse our filter with water boiled to 210 degrees, then add our coffee and level it out. Next we will add about 70g of bloom water, giving it a light stir before we let it finish. Normally, we will allow 30 seconds for the bloom, but we may wish to increase this, letting it bloom for 45 seconds to a minute if the coffee being used is very fresh.
Once bloomed we will add the rest of our water, which, like with the V60, we will pour while keeping the nozzle as level and even as possible, being sure to avoid any high and dry grounds and aiming for a nice flat, even bed.
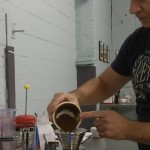
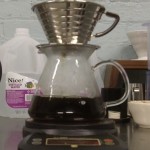
By about 2 mins 25 seconds we should just be finishing up our decant with a nice, flat, even bed. When it is finished, we can give it a little stir, pour a cup, and enjoy.
-
- Rinse you filter with water boiled to 210*.
-
- Add your coffee.
-
- Bloom for about 30s.
-
- Pour the rest of your water
-
- Kalita Wave
Hope this helped. And, if you would like more info for brewing with a Kalita, please checkout the video below.